Android Activation Customisation
For a quick primer on the activation steps please check:
It is possible to use either the default configuration and tweak its settings or create your own custom activation screens.
Customize The Default Configuration
The keyboard activation assets can be customized to match specific branding and design colors.
Customize The Benefits Screen Slides
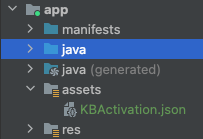
First create a file called KBActivation.json in the root folder of your app's assets folder.

Then paste the following contents and begin customization:
{
  "slides": [
    {
      "order": 0,
      "title": "mocha_benefits_slides_1_title",
      "description": "mocha_benefits_slides_1_description",
      "asset": "mocha_ac_1_image"
    },
    {
      "order": 1,
      "title": "mocha_benefits_slides_2_title",
      "description": "mocha_benefits_slides_2_description",
      "asset": "mocha_ac_2_image"
    },
    {
      "order": 2,
      "title": "mocha_benefits_slides_3_title",
      "description": "mocha_benefits_slides_3_description",
      "asset": "mocha_ac_3_image"
    }
  ]
}
The above example demonstrates a 3 slide benefits screen. It is possible to have more or less benefits as required.
Slide Objects
Each slide object in the JSON array represents an activation slide which is presented to the user. It has the following properties:
order: the position of the slide within the array of slidestitle: the slide title will use this string resource for its text viewdescription: the slide description will this string resource for its text viewasset: the slide image will use the drawable resource image with this resource name
Resources are loaded dynamically at runtime and must therefore link to valid resources.
Slide Strings
In your application strings either override the strings in the JSON file above, or create new strings and reference them correctly in the file:
- For example
mocha_benefits_slides_1_titlecan be defined in your applicationstrings.xmlfile and overridden with a new value. - Alternatively create a new string and reference it in the JSON file:
"title": "my_custom_slide1_title" - Once strings have been defined for the default language they should be localized for other languages as appropriate.
Slide Image
Each benefits screen slide displays an image. It's possible to either:
- override an image by placing an image with the same name (e.g.
mocha_ac_2_image) in the application drawable resources folder - or, add new image resources and reference them in the JSON file, e.g.
"asset": "my_custom_activation_2_image"
Ensure the actual resources are added to the application drawable resources folder. It is recommended to add drawable images for the following screen sizes for best results:
drawable-mdpi
drawable-hdpi
drawable-xhdpi
drawable-xxhdpi
drawable-xxxhdpi
Deep Linking to the Main App at the End of Onboarding
In addition to the customizable onboarding slides, the keyboard SDK now supports an optional feature that allows users to be redirected to a specific screen within the main application immediately after completing the onboarding process. This is accomplished by specifying a deep link URL in the KBActivation.json file.
deeplinkUrl Key
To utilize this feature, add a deeplinkUrl key at the same level as the slides array in your KBActivation.json configuration file. The deeplinkUrl should contain a URL that is handled by your main app to navigate the user to the desired screen.
Example Configuration with deeplinkUrl:
{
  "slides": [],
  "deeplinkUrl": "yourapp://main_screen"
}
Behavior
When deeplinkUrl is defined: Upon tapping the button at the end of the onboarding process, the SDK attempts to open the specified URL. This requires that the main app is configured to handle the provided URL scheme and path, ensuring that the user is navigated to the appropriate screen.
When deeplinkUrl is missing: The default behavior is preserved; the application will minimize/close when the user completes the onboarding process.
Configuring Your Main App to Handle Deep Links
To ensure a seamless experience, your main application must be configured to recognize and handle the deep link URL specified in the KBActivation.json file. This typically involves registering the URL scheme within your app and implementing the necessary logic to navigate to the specified screen when the app is opened via a deep link.
Create a Custom Activation Configuration
It is possible to override the default configuration behaviour of showing slides to the user and replace it with a custom activity. In order to do so use the following code:
import com.mocha.keyboard.framework.activation.ActivationConfiguration

class MyApplication : Application() {

    override fun onCreate() {
        super.onCreate()
        ...
        val configuration =
            ActivationConfiguration.newCustomConfiguration(ActivationActivity::class.java)
        ActivationExtensions.setConfiguration(configuration)
        ...
    }

}
In this code ActivationActivity is the name of your custom activity to display to the user.
It is optionally possible to implement the following interfaces inside your custom activation implementation:
/**
 * This interface should be used when creating a custom setup activity.
 * It has useful methods for setting up the keyboard.
 */
interface ActivationNavigator {
    /**
     * Launches system settings with the list of all available keyboards.
     * It should be called if the keyboard is not enabled.
     */
    fun launchInputMethodSettings(activity: Activity, onReturn: (() -> Unit)? = null)

    /**
     * Launches a system dialog with enabled keyboards.
     * It should be called if the keyboard is enabled, but not current.
     */
    fun launchInputMethodPicker()
}

/**
 * This interface should be used when creating a custom setup activity.
 * It describes keyboard state.
 */
interface ActivationKeyboardState {
    /**
     * Whether the keyboard is enabled in system settings
     */
    val enabled: Boolean

    /**
     * Whether the keyboard is switched on as current
     */
    val current: Boolean
}
Access to instances of these interfaces is handled by the following properties:
ActivationExtensions.navigatorActivationExtensions.state
Updated 6 months ago
